구현한 것들

간단한 오브젝트 풀링을 구현하여 터치 이펙트와 카드 파괴 이펙트를 구현하였다.

using System.Collections;
using System.Collections.Generic;
using UnityEngine;

public class ObjectPooler : MonoBehaviour
{
    public static ObjectPooler I;

    [Header("Pools")]
    public ObjectPool<TouchParticle> touchPool;
    public ObjectPool<Explosion> explosionPool;


    void Awake()
    {
        I = this;

        // 터치 이펙트 풀
        TouchParticle touchPrefab = Resources.Load<TouchParticle>("TouchParticle");
        touchPool = new ObjectPool<TouchParticle>(touchPrefab, transform, 10);

        // 카드 폭발 풀
        // 폭발은 그냥 생성 파괴 해도 될 수도? - 갯수가 얼마 없음
        Explosion explosionPrefab = Resources.Load<Explosion>("Explosion");
        explosionPool = new ObjectPool<Explosion>(explosionPrefab, transform, 4);

    }
}
using System.Collections;
using System.Collections.Generic;
using UnityEngine;

public class ObjectPool<T> where T : MonoBehaviour, IPoolable<T>
{
    [Header("풀링 프리펩")]
    T tPrefab;

    [Header("스택 풀")]
    Stack<T> objectPool = new Stack<T>();

    Transform parentTrans;

    public ObjectPool(T t, Transform trans, int initCount)
    {
        tPrefab = t;
        parentTrans = trans;

        for (int i = 0; i < initCount; i++)
        {
            CreateNewObject();
        }
    }

    public T GetObject()
    {
        T t = null;

        if (objectPool.Count > 0)
        {
            t = objectPool.Pop();
            t.gameObject.SetActive(true);
        }
        else
        {
            t = CreateNewObject();
        }

        return t;
    }

    void ReturnObject(T t)
    {
        objectPool.Push(t);
    }

    T CreateNewObject()
    {
        T t = Object.Instantiate(tPrefab, parentTrans);
        t.SetReturnObject(ReturnObject);
        t.gameObject.SetActive(false);
        return t;
    }
}

씬 전환 효과 구현

간단한 쉐이더를 이용해 씬 전환 효과를 구현하였다.

Shader "Unlit/Fade"
{
    Properties
    {
        _MainTex ("Texture", 2D) = "white" {}
        _StepValue ("FadeValue", Range(0,1)) = 1
    }
    SubShader
    {
        Tags { "RenderType"="Transparent" "Queue" = "Transparent" }
        Blend SrcAlpha OneMinusSrcAlpha


        Pass
        {
            CGPROGRAM

            #pragma vertex vert
            #pragma fragment frag

            #include "UnityCG.cginc"

            struct appdata
            {
                float4 vertex : POSITION;
                float2 uv : TEXCOORD0;
            };

            struct v2f
            {
                float2 uv : TEXCOORD0;
                float4 vertex : SV_POSITION;
            };

            sampler2D _MainTex;
            float4 _MainTex_ST;
            fixed _StepValue;

            v2f vert (appdata v)
            {
                v2f o;
                o.vertex = UnityObjectToClipPos(v.vertex);
                o.uv = TRANSFORM_TEX(v.uv, _MainTex);
                return o;
            }

            fixed4 frag (v2f i) : SV_Target
            {
                fixed4 col = tex2D(_MainTex, i.uv);
                fixed dist = distance(i.uv, float2(0.5, 0.5));
                col.a = step(dist, _StepValue);
                return col;
            }
            ENDCG
        }
    }
}

게임을 재시작 하거나 다음 단계로 넘어갈 때 Time.timeScale = 0 이 되어서 Time.deltaTime이 0이 된다. 그래서 이에 영향을 받지 않고자 Time.unscaledDeltaTime을 사용하였다.

IEnumerator CoFade(string sceneName)
    {
        float time = 0;
        while (time < fadeValue)
        {
            time += Time.unscaledDeltaTime / fadeTime;
            fadeImage.material.SetFloat("_StepValue", time);
            yield return null;
        }

        var op = SceneManager.LoadSceneAsync(sceneName);

        while (op.isDone)
        {
            yield return null;
        }

        time = fadeValue;
        while (time > 0)
        {
            time -= Time.unscaledDeltaTime / fadeTime;
            fadeImage.material.SetFloat("_StepValue", time);
            yield return null;
        }
    }

애니메이터와 파티클 또한 UnscaledTime 옵션이 존재한다.


시연 영상

화면 전환과 카드 파괴 풀링이 적용된 모습이다.


참고 : 

https://www.youtube.com/watch?v=Ufa8cYKQeEo 

https://koreanfoodie.me/983


유니티에서 일시정지 및 특정 물체 시간 정지 구현하기

Udemy 관련 개념 정리 및 Dev Log 를 기록하고 있습니다! 유니티에서 일시정지하기 유니티에서는 일시 정지 기능을 어떻게 구현하면 될까? 먼저 결론만 말하자면, Time.timeScale 값을 조절하여 Time.deltaT

koreanfoodie.me


'스파르타 Unity 1기' 카테고리의 다른 글

스파르타 Unity 8기 5일차 TIL  (0) 2023.08.11
스파르타 Unity 8기 4일차 TIL  (0) 2023.08.10
스파르타 Unity 8기 2일차 TIL  (0) 2023.08.08
스파르타 Unity 8기 1일차 TIL  (1) 2023.08.07
사전캠프 4일차  (0) 2023.08.04

구현한 것들

원의 방정식을 사용한 카드 세팅 연출

작은 원을 기준으로 현재 위치에서 원과 만나는 y좌표를 찾아 직선으로 움직이는 것이 아닌 원을 따라 곡선으로 움직이게 만들어준다.

IEnumerator CoMoveOffsetPosition(Transform cardTrans, Vector3 destination)
    {
        Vector3 offsetPos = cardTrans.position;
        Vector3 targetPos = Vector3.zero;
        float ratio = 0f;
        while (ratio < cardSettingTime)
        {
            ratio += Time.deltaTime;
            targetPos = Vector3.Lerp(offsetPos, destination, ratio / cardSettingTime);

            // 원의 방정식 (x-a)^2 + (y-b)^2 = r^2
            float halfRadius = radius * 0.5f;
            // 반지름의 제곱
            float powRadius = Mathf.Pow(halfRadius, 2);
            // 현재 x위치가 목표의 왼쪽인지 오른쪽인지
            bool isDestinationXLow = targetPos.x > destination.x;
            // 오른쪽이라면 반지름 빼주기 왼쪽이라면 반지름 더해주기 (원의 센터 x좌표가 반지름만큼 차이나니까)
            float powXPos = isDestinationXLow ? Mathf.Pow(targetPos.x - destination.x - halfRadius, 2) 
                : Mathf.Pow(targetPos.x - destination.x + halfRadius, 2);
            // y좌표
            float yPos = Mathf.Sqrt(Mathf.Abs(powRadius - powXPos));

            // 현재 위치에서 목표지점까지의 선분(원의 지름) 위의 점 + 원 중심으로부터 y좌표
            targetPos.y += yPos;
            cardTrans.position = targetPos;

            yield return null;
        }
    }

카드 뒤집기 연출

카드가 뒤집어지는 연출을 구현하였다.

앞면과 뒷면을 나누어 y축을 0~90도까지 회전 90~0도까지 회전하는 방식을 사용하였다.

IEnumerator CoFlip()
    {
        // 애니메이션 꺼주기 -> rotate 애니메이션 끄기
        anim.SetBool("isOpen", true);

        // 뒷면의 y축 회전을 0 ~ 90까지 증가
        float ratio = 0f;
        Vector3 backRotation = backTransform.rotation.eulerAngles;
        while (ratio < flipRotation)
        {
            ratio += Time.deltaTime * flipSpeed;
            backRotation.y = ratio;
            backTransform.rotation = Quaternion.Euler(backRotation);
            yield return null;
        }

        // 뒷면 -> 앞면 스위치
        frontTransform.gameObject.SetActive(true);
        backTransform.gameObject.SetActive(false);

        // 앞면의 y축 회전을 90 ~ 0까지 감소
        Vector3 frontRotation = frontTransform.rotation.eulerAngles;
        while (ratio > 0)
        {
            ratio -= Time.deltaTime * flipSpeed;
            frontRotation.y = ratio;
            frontTransform.rotation = Quaternion.Euler(frontRotation);
            yield return null;
        }

    }
IEnumerator CoReverseFlip()
    {
        float ratio = 0f;

        // 앞면의 y축 회전을 0 ~ 90까지 증가
        Vector3 frontRotation = frontTransform.rotation.eulerAngles;
        while (ratio < flipRotation)
        {
            ratio += Time.deltaTime * flipSpeed;
            frontRotation.y = ratio;
            frontTransform.rotation = Quaternion.Euler(frontRotation);
            yield return null;
        }

        // 앞면 -> 뒷면 스위치
        frontTransform.gameObject.SetActive(false);
        backTransform.gameObject.SetActive(true);

        // 뒷면의 y축 회전을 90 ~ 0까지 감소
        Vector3 backRotation = backTransform.rotation.eulerAngles;
        while (ratio > 0)
        {
            ratio -= Time.deltaTime * flipSpeed;
            backRotation.y = ratio;
            backTransform.rotation = Quaternion.Euler(backRotation);
            yield return null;
        }

        // 애니메이션 켜주기 -> rotate 애니메이션 키기
        anim.SetBool("isOpen", false);
    }

터치 이펙트 구현

간단한 파티클과 풀링으로 터치 이펙트를 구현하였다.

입력 감지

void Update()
    {
#if UNITY_ANDROID
        if (Input.touchCount > 0)
        {
            touch = Input.GetTouch(0);
            if (touch.phase == TouchPhase.Began)
            {
                GameObject particle = touchPool.GetObject();
                particle.transform.position = mainCam.ScreenToWorldPoint(touch.position);
            }
        }
#endif
#if UNITY_STANDALONE
        if (Input.GetMouseButtonDown(0))
        {
            ParticleSystem particle = touchPool.GetObject();
            Vector3 mousePos = mainCam.ScreenToWorldPoint(Input.mousePosition);
            mousePos.z = 0;
            particle.transform.position = mousePos;
        }
#endif

    }

스택으로 간단한 풀링 구현

using System.Collections;
using System.Collections.Generic;
using UnityEngine;

public class TouchPool
{
    ParticleSystem touchParticle;
    Stack<ParticleSystem> particlePool = new Stack<ParticleSystem>();

    Transform parentTrans;

    public TouchPool(ParticleSystem particle, Transform trans)
    {
        touchParticle = particle;
        parentTrans = trans;
    }

    public ParticleSystem GetObject()
    {
        ParticleSystem particle = null;

        if (particlePool.Count > 0)
        {
            particle = particlePool.Pop();
            particle.gameObject.SetActive(true);
        }
        else
        {
            particle = CreateNewObject();
            particlePool.Push(particle);
        }

        return particle;
    }

    void ReturnObject(ParticleSystem particle)
    {
        particle.gameObject.SetActive(false);
        particlePool.Push(particle);
    }

    ParticleSystem CreateNewObject()
    {
        ParticleSystem particle = Object.Instantiate(touchParticle, parentTrans);
        particle.GetComponent<TouchParticle>().SetReturnCallback(ReturnObject);
        return particle;
    }
}


중간 점검

오늘 개발한 것들을 포함한 플레이 영상이다.


참고 :

https://youtu.be/Xo7EEegTUfE


'스파르타 Unity 1기' 카테고리의 다른 글

스파르타 Unity 8기 4일차 TIL  (0) 2023.08.10
스파르타 Unity 8기 3일차 TIL  (0) 2023.08.09
스파르타 Unity 8기 1일차 TIL  (1) 2023.08.07
사전캠프 4일차  (0) 2023.08.04
사전캠프 3일차  (0) 2023.08.03

구현 내용

스프라이트 참조와 스케일 세팅

Resources.LoadAll로 Sprite를 다 부른 후 특정 스프라이트 기준으로 스케일을 세팅하였다.

void Start()
    {
        Time.timeScale = 1f;

        int[] teams = { 0, 0, 1, 1, 2, 2, 3, 3, 4, 4, 5, 5, 6, 6, 7, 7 };
        teams = teams.OrderBy(item => Random.Range(-1.0f, 1.0f)).ToArray();

        // 폴더의 스프라이트 모두 부르기
        Sprite[] sprites = Resources.LoadAll<Sprite>(CARD_PATH);

        for (int i = 0; i < 16; i++)
        {
            GameObject newCard = Instantiate(card);
            // newCard를 cards 안으로 옮겨줘
            newCard.transform.parent = GameObject.Find("cards").transform;
            float x = (i / 4) * 1.4f - 2.1f;
            float y = (i % 4) * 1.4f - 3.0f;
            newCard.transform.position = new Vector3(x, y, 0);

            Transform frontTrans = newCard.transform.Find("front");
            SpriteRenderer cardRenderer = frontTrans.GetComponent<SpriteRenderer>();

            cardRenderer.sprite = sprites[teams[i]];

            // 스케일 세팅
            Vector3 tempScale = frontTrans.transform.localScale;
            tempScale.x *= rtanSpriteSize / cardRenderer.sprite.rect.width;
            tempScale.y *= rtanSpriteSize / cardRenderer.sprite.rect.height;
            frontTrans.localScale = tempScale;
        }
    }

맞췄을 때와 아닐 때 구분하기

정해진 시간을 기준으로 맞췄을 때와 아닐 때를 구분하였다.

private IEnumerator CoVerifyMatching(string cardName, bool isCorrect = false)
    {
        // 맞췄을 때
        if (isCorrect)
        {
            matchText.text = cardName.Split('_')[0];
            matchText.color = correctColor;
        }
        // 아닐 때
        else
        {
            matchText.text = unCorrectMessage;
            matchText.color = unCorrectColor;
        }

        matchText.gameObject.SetActive(true);
        yield return new WaitForSeconds(matchTextTime);
        matchText.gameObject.SetActive(false);
    }


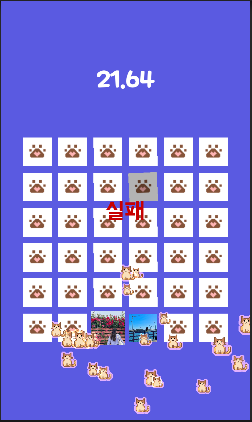
플레이 장면

인게임 플레이


느낀 점

 나는 게임 개발자로서 성장하기 위해 이번 부트캠프에 도전하게 되었다. 꾸준함과 노력은 결과를 배신하지 않는다고 믿고있다. 단순히 시간을 버리는 것이 아닌 주어진 시간에 집중하여 내 자신을 가꿔 한 발 더 성장하는 시간이 되었으면 좋겠다. 오늘 보다 나은 내일의 내가 될 것을 다짐하며 오늘 하루를 보냈다. 게으름과 싸워 지지말자 파이팅!

'스파르타 Unity 1기' 카테고리의 다른 글

스파르타 Unity 8기 3일차 TIL  (0) 2023.08.09
스파르타 Unity 8기 2일차 TIL  (0) 2023.08.08
사전캠프 4일차  (0) 2023.08.04
사전캠프 3일차  (0) 2023.08.03
사전캠프 2일차  (0) 2023.08.02

배운 것들

스플래시 이미지 : 앱을 켰을 때 떴다가 사라지는 이미지

Edit - Project Settings - Player - Splash Image

Splash Image

Splash Screen - Preview (기본은 Made With Unity)

Splash Style

- Light on Dark : 검은 화면에 빛

- Dark on Light : 빛에 검은 화면

Animation

Static - 그대로

Dolly - 커졌다 사라짐

Light on Dark
Dark on Light

Draw Mode

- Unity Logo Below

- All Sequential

Unity Logo Below
All Sequential

로고 : MeshType - FullRect

로고 이미지는 짤리는 경우가 있어 Mesh Type을 Full Rect로 해주면 좋다.

Full Rect - 이미지 전체 영역 렌더링

Tight - 투명영역을 제외한 RGBA 영역 렌더링

안드로이드 배포

안드로이드 마켓에 빌드하기 위해서는 64bit 지원이 필수

Configuration - Scripting Backend : IL2CPP

Target Architectures - ARM64 체크

publishing Settings : 앱에 대한 권한 설정

Keystore Manager 눌러서 만듬

Keystore Manager

유니티 광고

Project Settings - Services General Settings에 계정 연결하기

Organizations 선택 후 Create project ID

13세 이하 광고 - NO

Window - General - Services

Advertisement 설치

만약 이게 안 뜰 시 에디터 껐다 키기

Leran More - Unity Monetize 대시보드 이동

Unity Monetize 대시보드
프로젝트 연결

광고 세팅

끝 버튼 누르면 광고를 보여주고 광고를 다 봐야만 재시작을 할 수 있도록 함

using System.Collections;
using System.Collections.Generic;
using UnityEngine;

public class endTxt : MonoBehaviour
{
    public void ReGame()
    {
        adsManager.I.ShowRewardAd();
    }
}
using System.Collections;
using System.Collections.Generic;
using UnityEngine;
using UnityEngine.Advertisements;

public class adsManager : MonoBehaviour, IUnityAdsShowListener, IUnityAdsInitializationListener, IUnityAdsLoadListener
{
    public static adsManager I;

    string adType;
    string gameId;
    void Awake()
    {
        I = this;

        if (Application.platform == RuntimePlatform.IPhonePlayer)
        {
            adType = "Rewarded_iOS";
            gameId = "5369710";
        }
        else
        {
            adType = "Rewarded_Android";
            gameId = "5369711";
        }

        Advertisement.Initialize(gameId, true, this);
    }

    public void ShowRewardAd()
    {
        if (Advertisement.isSupported)
        {
            Advertisement.Show(adType, this);
        }
    }

    /*void ResultAds(ShowResult result)
    {
        switch (result)
        {
            case ShowResult.Failed:
                Debug.LogError("광고 보기에 실패했습니다.");
                break;
            case ShowResult.Skipped:
                Debug.Log("광고를 스킵했습니다.");
                break;
            case ShowResult.Finished:
                // 광고 보기 보상 기능 
                Debug.Log("광고 보기를 완료했습니다.");
                break;
        }
    }*/

    public void OnUnityAdsShowFailure(string placementId, UnityAdsShowError error, string message)
    {
        Debug.LogError("광고 보기에 실패했습니다.");
    }

    public void OnUnityAdsShowStart(string placementId)
    {
        Debug.Log("광고 보기를 시작했습니다.");
    }

    public void OnUnityAdsShowClick(string placementId)
    {
        Debug.Log("광고 보기를 클릭했습니다.");
    }

    public void OnUnityAdsShowComplete(string placementId, UnityAdsShowCompletionState showCompletionState)
    {
        Debug.Log("광고 보기를 완료했습니다.");
        gameManager.I.retryGame();
    }

    public void OnInitializationComplete()
    {
        Debug.Log("Init Success");
    }

    public void OnInitializationFailed(UnityAdsInitializationError error, string message)
    {
        Debug.Log($"Init Failed: [{error}]: {message}");
    }

    public void OnUnityAdsAdLoaded(string placementId)
    {
        Debug.Log($"Load Success: {placementId}");
    }

    public void OnUnityAdsFailedToLoad(string placementId, UnityAdsLoadError error, string message)
    {
        Debug.Log($"Load Failed: [{error}:{placementId}] {message}");
    }
}

광고를 적용하자.

참고 : 

https://notyu.tistory.com/43


유니티 스프라이트 (Sprite)

1. 스프라이트 ( Sprite ) 스프라이트는 텍스쳐이며, 2D 그래픽 오브젝트이다. 스프라이트는 2D 그래픽에 사용된다. 스프라이트는 PNG, JPG와 같은 이미지 파일이 아니다. UI에 그림파일을 등록하고, Sce

notyu.tistory.com


'스파르타 Unity 1기' 카테고리의 다른 글

스파르타 Unity 8기 2일차 TIL  (0) 2023.08.08
스파르타 Unity 8기 1일차 TIL  (1) 2023.08.07
사전캠프 3일차  (0) 2023.08.03
사전캠프 2일차  (0) 2023.08.02
사전캠프 1일차  (0) 2023.08.01

배운 것들

만약 열과 행의 갯수가 같다면 카드의 갯수를 for문을 하나만 쓰고도 표현할 수 있다.

float x = i / n;

float y = i % n;

for (int i = 0; i < 16; i++)
        {
            GameObject newCard = Instantiate(card);
            newCard.transform.parent = GameObject.Find("cards").transform;

            float x = (i / 4) * 1.4f;
            float y = (i % 4) * 1.4f;
            newCard.transform.position = new Vector3(x, y, 0);
        }

추가적으로 일반식을 구하여 위치를 맞춰봤다.

public GameObject card;

    public int line = 4;

    void Start()
    {
        for (int i = 0; i < Math.Pow(line, 2); i++)
        {
            GameObject newCard = Instantiate(card);
            newCard.transform.parent = GameObject.Find("Cards").transform;

            
            // (1) 0 (2) 0.5칸 (3) 1칸 ... => (n - 1) * 0.5 칸
            float fitCenterValue = (line - 1) * (1.4f * 0.5f);

            float x = (i / line) * 1.4f - fitCenterValue;
            float y = (i % line) * 1.4f - (fitCenterValue + 0.9f); // 0.9f == 높이 맞춰준 값
            newCard.transform.position = new Vector3(x, y, 0);
        }
    }

배열 랜덤 정렬

아래 배열은 랜덤하게 정렬되는데 UnityEngine.Random.Range(-1f, 1f)에서 item의 각 요소에 랜덤 값을 부여하여 그 부여된 값으로 정렬하기 때문에 랜덤 정렬이 가능한 것이다.

int[] rtans = { 0, 0, 1, 1, 2, 2, 3, 3, 4, 4, 5, 5, 6, 6, 7, 7 };
rtans = rtans.OrderBy(item => UnityEngine.Random.Range(-1f, 1f)).ToArray();

'스파르타 Unity 1기' 카테고리의 다른 글

스파르타 Unity 8기 2일차 TIL  (0) 2023.08.08
스파르타 Unity 8기 1일차 TIL  (1) 2023.08.07
사전캠프 4일차  (0) 2023.08.04
사전캠프 2일차  (0) 2023.08.02
사전캠프 1일차  (0) 2023.08.01

배운 것들

고양이 가 너무 빠를 때 VSync를 체크하면 된다.

VSync(Vertical Synchronization = 수직동기화) : 모니터에서 렌더링 할 때 더블 버퍼링을 사용하는데 이 때 모니터의 주파수에 맞게 렌더링 퍼포먼스를 조절하는 것

더블 버퍼링 : 백 버퍼와 프론트 버퍼를 사용해서 다음에 출력될 화면을 백 버퍼에 집어 넣고 화면이 갱신될 때 프론트 버퍼와 백 버퍼를 바꿔치게 해 백 버퍼의 내용을 보여 줌으로써 자연스러운 화면 전환이 일어나게끔 하는 것

피벗을 이용한 체력바 표시

피벗과 UI 이미지 두 개를 겹치는 것을 이용하여 체력바를 표시할 수 있다.


2D Rigidbody와 3DRigidbody

3D rigidbody

Kinematic : 물리법칙 받지 X but 충돌처리는 됨    ex) 맵

Dynamic : 물리법칙 O    ex) 플레이어

2D rigidbody

Static : 3D Kinematic과 동치 - 아예 움직이지 않음

Kinematic - AddforceV에는 움직이지는 않는데 간접적인 힘에는 움직임

Dynamic - 다 움직임


유니티 OX 퀴즈

2D에서도 Z축이 의미가 있음 - Layer의 역할을 함

우선순위 : Sorting Layer > Order in Layer > Z Position


Destroy는 즉시 파괴가 아니라 1프레임 이후에 파괴된다.

DestroyImmediate()는 에셋을 영구적으로 파괴하고 웬만하면 에디터 모드에서 쓰는 것을 권장한다.


참고 : 

https://www.yes24.com/Product/Goods/67305196


유니티 그래픽스 최적화 스타트업 - 예스24

게임개발의 최대 난적, 그래픽스 최적화를 다루는 책이 책은 게임개발의 최대 난적이라 할 수 있는 게임개발의 최적화에 대해서 다루는 책이다. 특히 유니티 엔진을 기반으로 게임을 가볍게 만

www.yes24.com


https://docs.unity3d.com/Manual/2DSorting.html


Unity - Manual: 2D Sorting

2D Sorting Overview Unity sorts Renderers according to a priority order that depends on their types and usages. You can specify the render order of Renderers through their Render Queue. In general, there are two main queues: the Opaque queue and the Transp

docs.unity3d.com


https://docs.unity3d.com/ScriptReference/Object.DestroyImmediate.html


Unity - Scripting API: Object.DestroyImmediate

This function should only be used when writing editor code since the delayed destruction will never be invoked in edit mode. In game code you should use Object.Destroy instead. Destroy is always delayed (but executed within the same frame). Use this functi

docs.unity3d.com


'스파르타 Unity 1기' 카테고리의 다른 글

스파르타 Unity 8기 2일차 TIL  (0) 2023.08.08
스파르타 Unity 8기 1일차 TIL  (1) 2023.08.07
사전캠프 4일차  (0) 2023.08.04
사전캠프 3일차  (0) 2023.08.03
사전캠프 1일차  (0) 2023.08.01

배운 것들

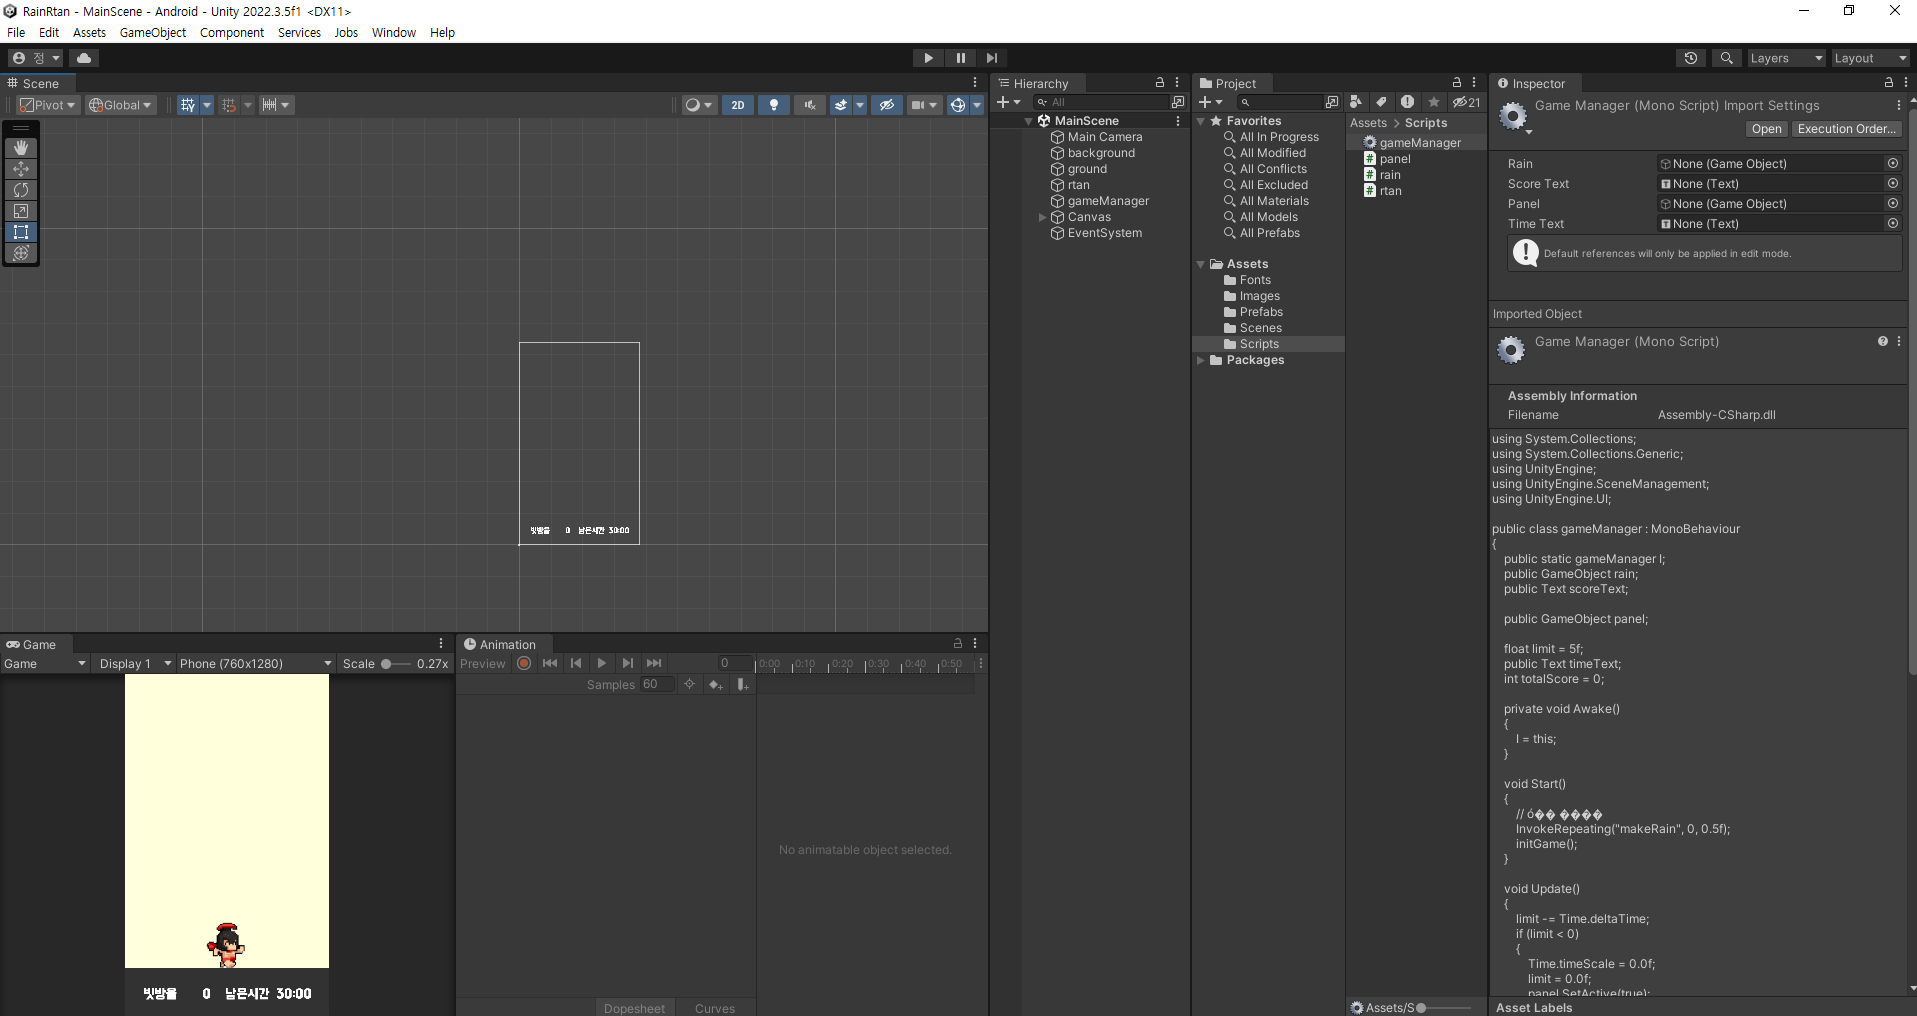
빗방울 피하기 미니게임에서 배운 것들

InvokeRepeating(string methodName, float time, float repeatTime);

반복하여 일정 시간만큼 함수를 실행한다.

.ToString(string format);

ToString()에 문자열으로 형식을 지정할 수 있다.

ex) float limit;     limit.ToString("N2");시 소숫점 2번째자리까지 표시하게 문자열로 바꾼다.

TimeScale = 0인데 르탄이가 멈추지 않는 이유

Time.timeScale과 관련된 움직임들은 멈춘다. ex) fixedUpdate, Time.deltaTime, WaitForSeconds();

ex2) 만약 캐릭터 움직임이 Time.deltaTime이 곱해지면 TimeScale에 영향을 받아 멈추고 아니고 그냥 Vector값을 더해주거나 하면 멈추지 않는다.

아래 코드처럼 Time.deltaTime이 곱해져 있지 않으며 Update안에서 동작하는 르탄이의 이동은 TimeScale에 영향을 받지 않으므로 TimeScale = 0; 이더라도 움직인다.

*추가 : TimeScale이 0이라도 애니메이션을 동작하게 하고 싶다면 Animator - Update Mode - UnscaledTime을 하면 된다.


참고 : 

https://malbongcode.tistory.com/36


Unity - Pause 버튼 구현하기(Time.scaleTime)

예시는 아래와 같음 구현하기 1. Time.timeScale 이용하기 Time.timeScale이란 아래와 같음 슬로우모션이나 더욱빠르게, 혹은 멈추게 할 수 있음 즉, 버튼을 누른 순간 Time.timeScale = 0; 해주면 됨 2. Button으

malbongcode.tistory.com

https://discussions.unity.com/t/animations-ignore-timescale/36591


Animations ignore TimeScale

Is it possible to play animations while the TimeScale is 0? I’m talking about bone animations imported from Maya. The basic scenario is that i have a bunch of rigidbodies on screen, i’d like to “pause” the screen on a button press, which plays an a

discussions.unity.com


'스파르타 Unity 1기' 카테고리의 다른 글

스파르타 Unity 8기 2일차 TIL  (0) 2023.08.08
스파르타 Unity 8기 1일차 TIL  (1) 2023.08.07
사전캠프 4일차  (0) 2023.08.04
사전캠프 3일차  (0) 2023.08.03
사전캠프 2일차  (0) 2023.08.02

진행한 것들

이번 주는 파이널 데모데이를 대비해 마지막 컨텐츠들을 추가하는 시간을 가졌다.

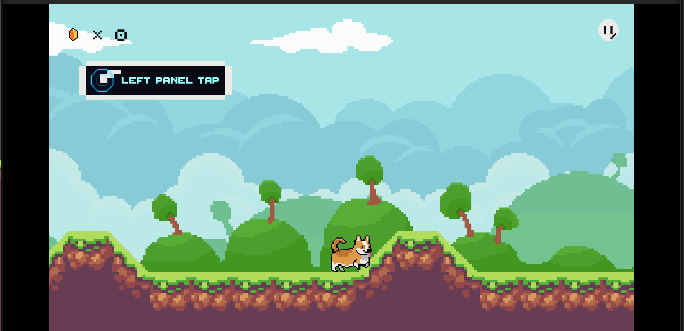
나는 주로 Level1 튜토리얼 부분을 맡아 맵을 만들고 인디케이터를 만드는 작업을 수행하였다.

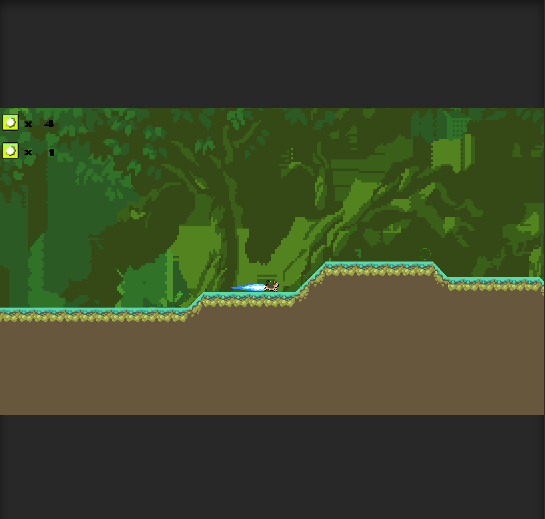
또한 스크립터블 오브젝트를 이용하여 맵 마다 배경을 다르게 세팅해주고 Texture offset을 타일링 하는 작업도 하였습니다.


한 주 후기

 이번 주는 버그가 굉장히 많은 주였다. 다른 사람들과의 작업물이 겹치는 경우가 많다보니 원인이 어디서 발생했는지부터 따져야 하고 원인지를 발견했을 때부터 다시 버그가 왜 일어났는지를 따져야 하기 때문에 시간이 더 걸렸던 것 같다. 사실 나는 버그를 잡는 작업을 좋아하는 편이다. 스트레스는 많이 받지만 버그를 잡고나서 프로그램이 정상적으로 돌아갈 때의 성취감은 나의 동기를 자극할만한 만큼 좋다. 특히나 이번에는 버그 중에 스크립터블 오브젝트 때문에 고생했는데 에디터에서 잘만 됐던 스크립트가 빌드만 되면 자꾸 Null값이 되어 제대로 불러오지 못하는 버그가 있었다. 레퍼런스를 찾으면서 여러 시도를 해보다가 당장의 해결책을 발견했는데 스크립터블 오브젝트를 참조한 컴포넌트를 제거하고 다시 붙이는 방법이었다. 원인은 불분명한데 이미 참조가 된 상태에서 스크립터블 오브젝트의 이름을 변경했어서 참조를 못 찾는 오류라고 짐작된다.

 다음 주에는 파이널 데모데이를 준비하기 위해 마지막 컨텐츠 제작과 다듬기 작업들, 그리고 발표 준비를 할 예정이다. 할 일이 많아 부담감이 좀 있지만 내가 열심히 한 만큼 나올 것이니까 열심히 해볼 생각이다. 다음 주도 파이팅!


유데미 큐레이션 바로가기

본 포스팅은 유데미-웅진씽크빅 취업 부트캠프 유니티 1기 과정 후기로 작성되었습니다.

진행한 것들

이번 주는 스프린트2를 진행하고 마지막 데모데이에 뭘 목표로 할 지 정하는 시간을 가졌다.

스프린트2에는 콤보 시스템의 효과를 추가하게 되었다.

콤보 별로 색을 다르게 하고 반짝이게 만들었다.


한 주 후기

 이번 주에는 스프린트2를 마무리하는 발표가 있었다. 개발팀에서 참관한다는 소식을 듣고 좀 부담을 가지게 되었다. 하지만 프로젝트를 생각했던대로만 끝까지 진행하고 발표도 잘 준비한다면 나쁘지 않은 결과가 있을 것이라 생각해 당장에 집중하기로 했다. 비록 발표는 발표자분들이 했지만 나도 질문에 답변하기도 했다. 개발팀분들의 질문이 좀 들어왔는데 내가 생각하지 못했던 부분들이 많았던 것 같다. 사용자의 입장에서 불편함을 겪을만한 것들을 먼저 생각한다는 점에서 '와, 역시 현업의 사람들은 다르구나' 하는 생각이 들었다. 우리 팀의 발표가 끝나고 진이 다 빠지게 되었다. 마지막 데모데이 때 뭘 할지 확실히 정해진 시간이 되기도 했던 것 같다.

 다음 주에는 출시를 목표로 데모데이까지 개발을 진행할 것이다. 다음 주도 파이팅!


유데미 큐레이션 바로가기

본 포스팅은 유데미-웅진씽크빅 취업 부트캠프 유니티 1기 과정 후기로 작성되었습니다.

진행한 것들

저번 주에 기획한 내용을 바탕으로 프로젝트를 다시 개발하게 되었다.

나는 포스트 프로세싱을 적용하는 부분과 콤보 시스템을 맡게 되었다.

구간에 따라 다르게 포스트 프로세싱을 적용했다.

연속적으로 성공했을 때 증가하는 콤보를 계산하고 UI상에 보여준다.

콤보 시스템


한 주 후기

 이번 주에 포스트 프로세싱과 콤보 시스템을 만들면서 URP에 대해 많이 배운 것 같다. 특히나 포스트 프로세싱의 URP를 따로 적용하는 부분에서 어려움이 좀 있었는데 먼저 URP를 세팅하는 것부터 새로 배우게 되었다. URP는 일반 프로젝트와는 다르게 URP 에셋에 원하는 Render 데이터를 넣고 적용한 다음 Material을 다 바꿔줘야 적용이 된다. 포스트 프로세싱 방법은 하루동안 헤매다가 멘토님께 질문드리게 되었는데 카메라의 Render되는 방법이 달라서 카메라 stack에서 순서에 따라 Base, Overlay로 나누고 Culling Mask를 해당 레이어만 적용하여 보여줘야 포스트 프로세싱도 따로 적용할 수 있었다. URP를 처음 사용해보아서 삐걱댔지만 해결하고나니 방법을 몰라서 못했던 것이지 하면 쉽다는 것을 알게 되었다.

 다음 주에는 추가된 기획 내용에 따라 팀원들과 나눠서 개발할 생각이다. 어렵지 않게 잘 해낼 수 있다고 생각한다. 다음 주도 파이팅!


유데미 큐레이션 바로가기

본 포스팅은 유데미-웅진씽크빅 취업 부트캠프 유니티 1기 과정 후기로 작성되었습니다.

+ Recent posts